

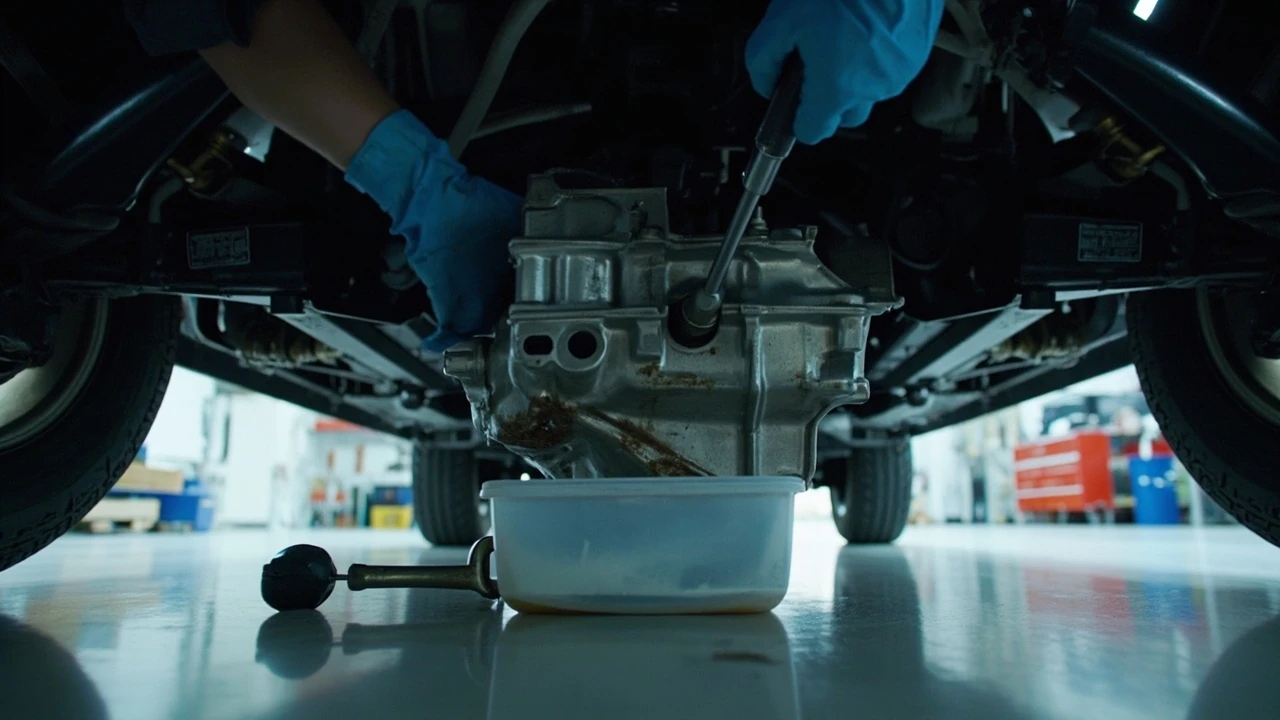
What a transfer case fluid change actually accomplishes
A transfer case fluid change is more than draining old lubricant and pouring new fluid into the opening. The service cleans the oiling system, replaces fluid that has collected wear particles or lost its expected performance, and confirms that the transfer case has the correct amount of fluid. That matters because the transfer case distributes engine torque between the front and rear driveshafts on many four-wheel-drive vehicles. If the wrong fluid is used, the level is wrong, or air enters the case, symptoms can include difficult engagement, unusual driveline noise, harsh shifts, or binding in tight turns.
The exact procedure depends on the vehicle. Some transfer cases have a service plug that requires the case to be filled through a fill port, while others are serviced by removing the output shaft or another cover. Fill plugs also differ: some cases use a threaded plug with a gasket, while others use a deeper plug or a side fill tube. The fluid specification matters just as much as the sequence. Do not assume that transmission fluid, gear oil, or the lubricant used in a front differential is automatically correct for the transfer case.
Before starting, identify the transfer case by its position and design, locate the manufacturer’s fluid type and capacity, and determine the required drain and fill procedure. This guide explains the common process and the decisions that make a transfer case fluid change cleaner and safer. Always treat the vehicle-specific service information as the final authority.
Why transfer case fluid condition matters
Unlike an engine coolant circuit, a transfer case is not designed to cool the vehicle. Its lubricant lubricates bearings, gears, chains, and internal shafts while carrying loads through the driveline. The fluid also helps control corrosion and carries contamination away from critical surfaces until the fluid filter or case captures it.
Over time, normal wear produces small amounts of metal and polymer particles. Repeated heat cycles can also reduce the fluid’s ability to protect the components as intended. This is particularly relevant to vehicles that tow, carry heavy loads, drive in heat, crawl over trails, or operate through deep water. Severe service can accelerate fluid degradation even when the odometer is not especially high.
The general principles for fluid selection overlap with those used for heat-transfer fluid, which broadly refers to a fluid that carries thermal energy between areas. However, a transfer-case lubricant is chosen primarily for lubrication, compatibility, viscosity, and load capacity in the mechanism, not to move heat from an engine to a radiator.
Low fluid can reduce lubrication at the very points where the case needs it. A level that is too high can cause foaming or aeration, particularly if the case is overfilled or the vehicle has been driven before the fluid level is checked. Aerated fluid may look cloudy or foamy at the dipstick, and its level can appear lower than the actual volume because bubbles occupy space.
A transfer case fluid change can also expose an underlying issue. If the drain fluid contains heavy metal debris, the magnet in the drain plug has collected significant material, or the new fluid drains out immediately, the transfer case may already have damage. In that situation, continued driving is less prudent than having the case inspected.
What you need before starting the job
Gather the vehicle-specific information before removing a plug. The owner’s manual or manufacturer service information should identify the correct fluid, fill capacity, drain procedure, plug torque, and any special instructions. A quick search by year, make, model, and transfer-case designation is helpful, but conflicting listings are not. Confirm the case design rather than relying on a vehicle name alone, because manufacturers can use different cases across trim levels or model years.
Prepare the following items:
- The exact fluid specified for the transfer case, in enough quantity for the drain-and-refill volume plus a small margin.
- A drain pan large enough to collect the fluid without spilling it onto the floor.
- The correct socket, wrench, or hex bit for the drain and fill plugs.
- New drain-plug gasket or sealant if the manufacturer requires it.
- A clean rag, paper towels, and a container for the old fluid.
- A jack, jack stands, wheel chocks, and the correct wheel-removal tools if the service point is not accessible from underneath the vehicle.
- A flashlight, a ratchet extension, and a drain plug magnet if the plug type permits removal.
- A suitable funnel or adapter if the fill opening is recessed or difficult to reach.
Wear eye protection and gloves, and park on level, firm ground. If the transfer case requires removal of an output shaft, sealing member, or cover, the job may demand a transmission jack, a support fixture, and more experience. Those are not small convenience steps: dropping or damaging a driveshaft can turn a routine service into a major repair.
Arrange used-fluid disposal properly. Do not pour it onto the ground, into a storm drain, or into an unlabeled container. Local rules may treat transfer-case fluid differently from engine oil, so a recycling center or automotive service facility may be the safest destination.
How to change transfer case fluid safely
A standard drain-and-fill service follows a consistent sequence. The details differ by transfer case, so read every step as a general procedure rather than a substitute for the vehicle manual. Keep the fluid type visible throughout the job so a bottle of the wrong lubricant does not get opened.
1. Confirm the transfer case and service specification
Locate the transfer case and identify its design. It is commonly mounted between the transmission and front or rear driveshaft on body-on-frame vehicles. Some independent front-drive modules may have no routine transfer-case service because there is no traditional transfer case to lubricate.
Write down the required fluid specification and capacity. If the manual states a separate fluid for the transfer case, follow it even when the neighboring differential or axle uses another product. Do not select a fluid based only on its color. Viscosity, additive package, and manufacturer approval are more important than appearance.
2. Position the vehicle for access and a correct level
Set the parking brake, chock the wheels, and support the vehicle correctly. Many service procedures call for the vehicle level with the transmission in neutral and the transfer case in its specified mode, often four-wheel drive or high range. The required mode varies, and an incorrect mode can affect where fluid settles in the case.
Clean the area around the drain and fill openings before removing anything. Dirt entering an open case can scratch surfaces or contaminate the new fluid. Place the drain pan below the plug with enough clearance to remove the plug fully without spilling.
3. Remove the drain plug and let the fluid drain
Remove the drain plug slowly, especially after the fluid begins to drain. Hold the plug clear of the case so its threads do not catch the edge. Let the old fluid flow out until the stream stops. Do not rush the final moments with a shop towel because small amounts of fluid remain in the case’s low points and internal passages.
Inspect the drain plug and the old fluid. A normal magnetic plug may carry a light residue. Large shiny flakes, chunks, or excessive dark metallic debris are warning signs. If the plug has a crush washer, replace it rather than reusing it if the service instructions call for a new one. Clean the plug threads and mating surface.
4. Refill through the designated opening
Install the drain plug with the specified sealant or new gasket and tighten it to the manufacturer’s torque. Then add the new fluid through the correct fill opening. If the case is filled through a drain port, the plug may be removed again after the case is refilled, and that port may function as the level check. If the case uses a separate fill plug and dipstick, use both as specified.
Do not simply pour a bottle into the fill hole and assume the amount is correct. Volume and level are related but not identical. A case can be filled to capacity before the fluid reaches the proper level because some fluid remains in galleries and other low areas. Add fluid in manageable amounts, then check the level according to the service procedure.
5. Check the level and cycle the driveline
With the transmission in neutral and the transfer case in the specified mode, inspect the level using the prescribed dipstick, sight plug, or service port. The vehicle may need to be briefly moved or the transfer case cycled so fluid reaches its internal passages. Follow the manual’s sequence rather than spinning the driveline on pavement unnecessarily.
After adding more fluid as needed, reinstall the fill plug or level-check plug with the correct sealing hardware and torque. Replace the drain plug if it was removed for the final level check. Reinstall shields, skid plates, wheels, and other removed components.
6. Verify the work
Start the vehicle and check beneath the transfer case for leakage. Listen for new fluid moving through the case, and confirm that the transfer case engages as expected. Recheck the level after the vehicle has been driven and the fluid has had time to settle if the manual specifies a warm check. A small adjustment may be needed because the measured level can change with fluid temperature and internal distribution.
Dispose of the old fluid and record the date, mileage, fluid type, and capacity used. That record helps the next service provider avoid repeating a full-fill error and gives the owner useful history if the case later develops a leak or noise.
| Stage | What the technician or owner should do | Common mistake to avoid |
|---|---|---|
| Identification | Confirm the case design, fluid specification, capacity, plug locations, and torque requirements. | Choosing fluid because it is labeled for a nearby differential or transmission. |
| Draining | Remove the plug slowly, let the old fluid drain fully, and inspect the plug and fluid. | Rushing the drain, losing the plug, or ignoring heavy metallic debris. |
| Refilling | Add the approved fluid through the designated port in manageable amounts. | Pouring in the entire measured capacity without checking the actual level. |
| Leveling | Use the specified mode, dipstick, or sight plug and adjust as needed. | Checking a cold case while ignoring the manual’s required conditions. |
| Final check | Check for leaks, verify operation, and recheck the level after settling or warming. | Assuming no visible leak means the level and fluid type are correct. |
Choosing the right fluid for your transfer case
The fluid designation should come from the vehicle manufacturer. Many transfer cases use a dedicated low-viscosity gear fluid, while others specify a particular automatic transmission fluid or synthetic gear oil. A product can look suitable and still be wrong because its friction modifiers, additives, seal materials, or viscosity behavior do not match the manufacturer’s requirements.
Pay attention to the fluid’s base type, viscosity grade, and approval language. Do not rely on a container that merely says it is suitable for “transfer cases” unless it meets the exact specification called out for the vehicle. Also avoid mixing fluids unless the manufacturer expressly permits it. The risk is not limited to a color mismatch; additive packages may not be compatible with seals or the materials used in the transfer case.
Fluid capacity also varies. A common mistake is to use a figure for the transmission capacity rather than the transfer case capacity. Another is to double-drain the case and add a full amount after each drain, then overfill the second time. If the case has two drain plugs, a complete service can require draining both sections and combining the specified quantities.
Check the condition of related seals while the case is open. A weeping seal may not cause an immediate problem, but it can explain a low fluid level after servicing. If the drain plug or fill plug threads are damaged, replace the plug when the manufacturer allows it rather than forcing a compromised fastener into place.
For vehicles that also need transmission or differential service, keep each fluid in a separate, clearly labeled container. Transfer-case fluid should not be used in the transmission simply because both systems contain gears. If you are checking broader driveline condition, bad spark plug symptoms can help rule out an unrelated engine fault when a vehicle runs poorly, but driveline symptoms should still be diagnosed at the transfer case itself.
How much fluid should go into the transfer case?
Use the fill capacity and level procedure specified for the exact vehicle. The listed capacity may represent a complete system volume, the amount required after a full drain, or a refill allowance after the factory fill. Those are not interchangeable instructions.
As a general guide, add fluid gradually and stop before the last portion. Then inspect the level using the designated method. If the case lacks a conventional dipstick, the drain or fill opening may be used to check the level at a specific position. The service information should identify whether the vehicle needs to be level, raised, or placed in a particular gear or transfer mode.
Temperature also affects the reading. A cold case may show a different level from a warm one, and some manufacturers specify a warm check because fluid expansion and circulation affect the result. Use the specified condition rather than comparing a reading with an online photograph from an unrelated vehicle.
Overfilling can be as damaging as underfilling. Excess fluid may be pushed into seals or aerated during operation. Common signs include a higher-than-normal fluid level, foamy fluid, a churning sound during low-speed driving, fluid on the outside of the case, or leakage past a seal. If a drain plug has been replaced incorrectly, overtightened, or installed without the required sealant, it may leak even though the fluid level is right.
A final level check is important because transfer cases contain internal passages that can trap air after draining. After the first drive, inspect for seepage and recheck the level if required by the manual. If the level drops quickly, investigate the cause before adding more fluid. Repeated low-level conditions point toward leakage, incorrect plug installation, a cracked casting, or an internal seepage path.
Troubleshooting symptoms before and after the service
Symptoms can help determine whether a transfer case fluid change is appropriate, but they do not prove that fluid is the only cause. Transfer-case problems can resemble transmission, differential, axle, wheel-bearing, or driveshaft issues. Begin with a clean, level test and confirm that the noise or behavior changes with the transfer mode.
The following patterns can help narrow the investigation:
- Grinding or whining that changes with mode: If the sound appears in four-wheel drive or low range and disappears in two-wheel drive, the transfer case deserves attention. Confirm that the sound is not coming from a front or rear axle.
- Harsh engagement or delayed engagement: Low fluid, aerated fluid, incorrect fluid, worn synchronizers, or internal damage may be involved. Check the level and condition before replacing parts.
- Fluid on the underside of the vehicle: Identify the source before topping up. A transfer-case leak may appear near a plug, seal, cooler line, or case joint and can be mistaken for a nearby axle leak.
- Burning smell or rising temperature: Stop driving and inspect for a severe leak or overload condition. Continuing to drive can turn a fluid service into damage to gears or bearings.
- Clicking that occurs only in drive: This may relate to an engagement component, driveshaft, CV joint, or transfer case. If the sound is intermittent and related to starting or electrical accessories, car clicks when trying to start covers a different diagnostic path.
After the service, a brief fluid-circulation sound may be normal while trapped air moves through the case. Persistent knocking, grinding, whining, or shifting harshness is not a reason to keep driving until the sound disappears. Recheck the level first, then investigate the mechanical cause.
Heavy debris in the drain plug calls for a closer inspection. Light residue can occur during normal wear, but large particles can indicate broken gear teeth, bearing material, or a damaged chain. The appropriate next step may be an oil sample, case inspection, or professional teardown. Replacing the fluid cannot restore damaged internal components.
When a transfer case fluid change is worth doing
Follow the manufacturer’s maintenance schedule when one is provided. That schedule should state the interval, fluid specification, capacity, and any conditions that alter the service. Because transfer cases vary widely, a generic interval based only on mileage is less dependable than the information for the exact case.
Service is especially reasonable when the vehicle has a documented history of fluid replacement and now has higher mileage, unknown maintenance records, or signs that may involve lubrication or fluid condition. A fluid change can also make sense after a repair in which the case was opened or the oil was drained.
Severe use can justify checking the condition sooner. Relevant examples include repeated towing, hauling heavy loads, extensive off-road travel, operation in extreme heat, frequent deep-water crossings, or use where the case is exposed to contamination. These conditions do not automatically prove the fluid is bad, but they justify closer adherence to the specified service and inspection procedures.
A fluid change is not a universal repair. It will not fix a damaged gear, failing bearing, stripped threads, bad seal, electrical shift problem, or mechanical problem elsewhere in the driveline. It can also reveal that the case needs attention. If a vehicle was recently serviced elsewhere and still makes severe noises, leaks, or shifts harshly, schedule a diagnosis instead of repeating the service in the hope that fresh fluid will solve it.
Some cases do not have a routine drain-and-fill procedure. A service plug may be welded in place, the case may be sealed for factory fill, or the manufacturer may specify a different refill process. In those situations, follow the service information or consult a technician experienced with that driveline system.
Common transfer case fluid change mistakes
Most avoidable problems come from missing a model-specific detail or rushing a step that seemed minor. The following mistakes can lead to underfilling, overfilling, contamination, leaks, or inaccurate conclusions after the service.
- Using fluid for the wrong component. Differential fluid, transmission fluid, and transfer-case fluid may look similar but have different requirements.
- Guessing the capacity. A wrong capacity can leave the case low or create excess fluid and foaming.
- Failing to clean the fill opening. Dirt on a plug or in a recessed port can enter the case during the refill.
- Reusing a crushed drain-plug gasket. A deformed sealing washer may allow a slow leak that appears after the vehicle is driven.
- Over-tightening the plug. Stripped threads or a cracked case can turn a small service into a larger repair.
- Checking the level without selecting the required drive mode. Transfer-mode settings and transmission position can affect the reading.
- Ignoring debris. A magnetic plug is useful because it shows the type and quantity of material captured.
- Not checking for leaks afterward. A slow drip may become obvious only after the vehicle has moved.
- Repeatedly topping up without finding a leak. If the level keeps falling, more fluid may hide the symptom while the original problem continues.
- Using the service as a substitute for diagnosis. Fresh fluid cannot correct worn mechanical parts.
Protecting the vehicle’s electrical system is also important when working around a transmission tunnel or transfer case. If the service requires lowering or removing components near the battery or wiring, observe correct disconnection procedures. For a broader check on electrical voltage, how many volts should a car battery have provides a separate reference, but battery condition does not determine the correct transfer-case fluid.
| Problem | Likely service-related causes | What to check next |
|---|---|---|
| Low level immediately after filling | Wrong fill port, incorrect capacity, fluid still circulating, or an internal leak. | Verify the service procedure, transfer mode, temperature, and all plugs and seals. |
| Fluid level rises above the mark | Overfilling, fluid expansion, or a level check performed under the wrong conditions. | Recheck at the specified temperature and vehicle position; do not drain blindly. |
| Foamy or cloudy fluid | Overfill, air entrainment, or fluid mixing. | Confirm the product, correct the level, and inspect for leaks. |
| Leak at a drain plug | Loose plug, missing gasket, incorrect sealant, damaged threads, or over-tightening. | Clean the area, inspect the plug and threads, and verify the specified torque. |
| Grinding or whining after the service | Existing internal damage, low fluid, trapped air, or an unrelated driveline fault. | Check fluid level and debris, then test the noise in different transfer modes. |
| Heavy metallic debris | Wear or internal component failure. | Stop relying on the fluid change alone and arrange an inspection. |
How to confirm the service was completed correctly
A finished transfer case fluid change should leave a clear record and several observable results. The correct fluid appears at the designated level under the specified conditions. New plugs and gaskets are installed, and the case has no visible leakage during the test drive. The transfer case engages smoothly, and no new noise or warning indication appears.
Review the following points before considering the job complete:
- The fluid product and quantity match the vehicle’s documented specification.
- The drain plug, fill plug, level plug, and any removed cover are properly installed.
- The transfer-case mode and transmission position were correct during the level check.
- The oil pan or protective shield was refitted without a pinch or obstruction.
- No drain-plug seal, thread damage, or case-finish damage was overlooked.
- The old fluid was disposed of properly.
- The next service date was recorded based on mileage and time.
After the vehicle is driven, check the area under the case in ordinary lighting and again on a clean surface if necessary. Recheck the fluid level at the interval specified by the manufacturer. If the dipstick or service plug is difficult to reach, arranging a level check at the same shop that performed the service can prevent an inaccurate estimate.
Keep the service receipt and fluid information with the vehicle records. A note such as “12,000 miles, transfer case drained and refilled with manufacturer-specified fluid, 2.8 quarts” is more useful than a vague entry saying the case was serviced. The exact volume should come from the vehicle specification and measured refill, not a universal formula.
Frequently asked questions
How often should I change transfer case fluid?
Follow the service interval in the owner’s manual for the exact vehicle and transfer case. Severe towing, hauling, off-road use, extreme heat, and water crossings may justify more frequent inspection. If no reliable records exist, mileage and operating conditions can help guide a technician’s recommendation, but they should not replace the case-specific specification.
Do I need to change transfer case fluid on every 4×4 vehicle?
No. Some four-wheel-drive systems do not have a separate transfer case with a serviceable fluid fill. Other cases are filled at the factory and may have a defined service procedure. Confirm the actual driveline layout and manufacturer instructions before buying fluid or removing plugs.
Can I use transmission fluid in a transfer case?
Only when the manufacturer specifies that exact fluid or approves it for that case. Transfer cases may use a dedicated gear oil or a particular automatic transmission fluid. The labels and colors are not enough to establish compatibility, and mixing products without permission can cause lubrication, seal, or friction problems.
How much transfer case fluid do I need?
Use the capacity listed for the exact vehicle and service procedure. Some manuals distinguish a complete fill from a partial drain-and-refill amount, and some cases have two drain points. Do not assume that the entire capacity must be added after a drain because internal passages and recesses can make the final level different from the volume poured in.
What color should transfer case fluid be?
Color is not a reliable specification. New automatic transmission fluids may be red, while gear oils may be amber, green, or another shade. Check the fluid’s stated viscosity, type, and manufacturer approval. After draining, very dark fluid or metallic debris can indicate wear or contamination, but color alone does not determine the required product.
Can I overfill a transfer case?
Yes. Excess fluid can cause aeration, foaming, leakage, and pressure against seals. Check the level in the specified transfer mode and at the required temperature, adding fluid gradually. If the case is overfilled, follow the manual’s drain-and-level procedure rather than simply removing an arbitrary amount.
Will a transfer case fluid change fix grinding or harsh shifting?
Not necessarily. Fresh fluid can help when poor fluid condition is the cause, but worn gears, bearings, synchronizers, chains, seals, or shift mechanisms will remain faulty. Check the fluid level and inspect the drained fluid for debris. Persistent or severe noises warrant a mechanical diagnosis.
Is metal in the drain plug normal?
A small amount of light residue can occur with normal wear, especially on a magnetic plug. Large shiny pieces, heavy dark sediment, or repeated debris after servicing suggests an internal problem. Photograph the plug and debris, avoid discarding the evidence, and have the case inspected if the quantity is significant.
Do I need to bleed air from the transfer case?
Air can remain after draining, but not every case has a dedicated bleed procedure. Follow the manual for the required transfer mode, transmission position, fill sequence, and level check. Some systems circulate fluid through normal operation, while others specify a precise method. Do not improvise by spinning the vehicle at high speed or repeatedly adding fluid without a level reference.
Why does the fluid level change after driving?
Temperature expansion, fluid circulation, and movement between internal chambers can change the reading. The manual may require a warm recheck after the first drive. If the level falls quickly or keeps dropping, inspect for leaks and incorrect plug installation instead of treating the fluid change as a repeated top-up solution.




Leave a Reply